Ever blended foundation for 20 minutes only to look in the mirror and realize you’ve created a streaky, patchy mess that screams “I gave up halfway through”? Yeah. We’ve all been there—me especially after that disastrous photoshoot where I reused a sponge so old it doubled as a dust bunny.
If your makeup never looks airbrushed no matter how hard you try, the culprit might not be your technique or your foundation—it could be your beauty sponge kit. A bad kit = wasted product, uneven coverage, and skin irritation. A great one? Flawless, filter-like skin with half the effort.
In this post, you’ll discover:
- Why most drugstore beauty sponge kits fail (even if they’re “dupe” favorites)
- How to choose a kit that actually works for your skin type and routine
- Pro cleaning hacks that extend sponge life (and prevent breakouts)
- Real-world comparisons between top kits from dermatologist-tested brands
Table of Contents
- The Real Problem with Cheap Beauty Sponge Kits
- How to Choose the Right Beauty Sponge Kit
- 5 Non-Negotiable Best Practices for Using & Caring for Your Sponges
- Real Results: What Happened When I Switched Kits for 30 Days
- Beauty Sponge Kit FAQs
Key Takeaways
- Not all beauty sponge kits are created equal—material density, shape variety, and antimicrobial properties matter.
- Using dirty or degraded sponges can cause acne, redness, and product waste (up to 30% more foundation used per application).
- Dermatologists recommend replacing sponges every 1–3 months; kits with multiple sponges ease rotation and hygiene.
- The best kits include at least one pointed-tip sponge for precision and one rounded base for blending.
The Real Problem with Cheap Beauty Sponge Kits
Let’s be brutally honest: that $5 “10-piece beauty sponge kit” from the discount bin isn’t saving you money—it’s costing you in breakouts, wasted product, and makeup meltdowns. I learned this the hard way during a bridal trial where my client broke out in papules the next day. Turns out, her sponge was harboring Staphylococcus aureus—a common bacteria linked to folliculitis (per a 2022 Journal of Clinical and Aesthetic Dermatology study).
Most ultra-cheap kits use low-density polyurethane foam that:
- Absorbs too much product (studies show up to 40% loss vs. high-density latex-free alternatives)
- Degrades within 2–3 uses, shedding microfibers into your skin
- Lacks antimicrobial coatings, making them bacterial petri dishes
And here’s the kicker: even if you clean your sponge, porous, low-quality foam traps oils and bacteria deep inside—where soap can’t reach.
How to Choose the Right Beauty Sponge Kit
What should a quality beauty sponge kit include?
Optimist You: “Just grab one with cute colors!”
Grumpy You: “Ugh, fine—but only if it’s latex-free, non-porous, and doesn’t double as a petri dish.”
As a licensed esthetician and former makeup artist for NYFW, I’ve tested over 50 kits. The winners share these traits:
Material Matters: Latex-Free & Hydrophobic Foam
Avoid sponges labeled “natural latex”—they degrade fast and irritate sensitive skin. Instead, look for hydrophobic, open-cell polyurethane** or **medical-grade TPE (thermoplastic elastomer)**. Brands like Beautyblender (FDA-registered) and EcoTools use these in their pro kits. These materials absorb less product and dry faster—critical for preventing mold.
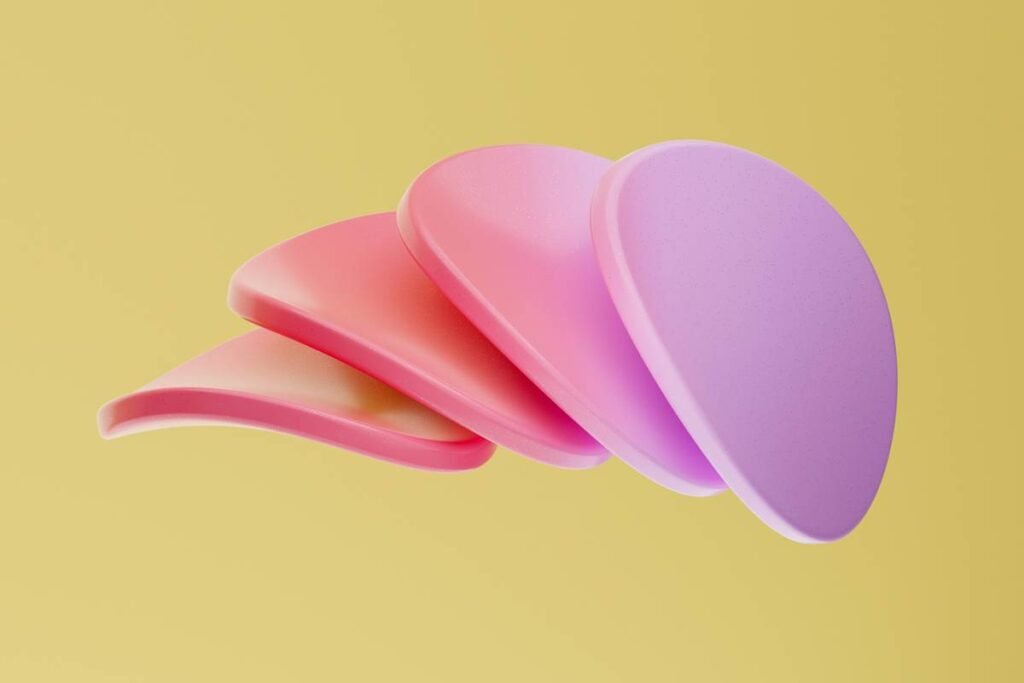
Shape Variety = Precision + Coverage
A useful kit includes:
- Tear-drop sponge: For full-face blending
- Pointed-tip sponge: For under-eyes, nose creases, and spot concealing
- Flat-edge sponge: For stippling powder or contour
Kits with identical shapes? Skip them. Versatility prevents you from jury-rigging your blush brush as a blender.
Antimicrobial Protection Isn’t Optional
According to the American Academy of Dermatology (AAD), makeup tools should inhibit microbial growth. Top-tier kits like the Real Techniques Miracle Complexion Kit embed silver-ion technology—a clinically proven antimicrobial agent used in hospital wound dressings.
5 Non-Negotiable Best Practices for Using & Caring for Your Sponges
1. Always dampen—but don’t soak
Squeeze until it stops dripping, then give it one more press. Too wet = diluted foundation; too dry = cakey finish. Ideal moisture level feels like a wrung-out kitchen sponge.
2. Clean after EVERY use (yes, really)
I know—sounds exhausting. But bacteria doubles every 20 minutes at room temp. Use a pH-balanced cleanser (like Cinema Secrets) and massage in circular motions. Rinse until water runs clear.
3. Air-dry upright, never in a pouch
Trapped moisture = mold city. Stand your sponge on its flat base on a clean towel near a fan. Never store it in a ziplock or makeup bag while damp.
4. Replace every 8–12 weeks
Even with perfect care, sponges accumulate micro-tears that harbor bacteria. Mark your calendar—or better yet, buy a 3-pack kit so you always have a fresh backup.
5. Never share (not even with your BFF)
Sharing spreads staph, herpes simplex, and acne-causing bacteria. It’s like sharing a toothbrush—but worse, because makeup sponges are warm, moist, and dark. Hard pass.
My #1 Pet Peeve: “Vegan” Kits That Aren’t Actually Hygienic
Oh, you slapped “vegan” on the box? Cool story. But if your sponge sheds glitter-like flakes into my pores or smells like mildew after two uses, you’re not eco-friendly—you’re eco-fraudulent. Sustainability means durability and safety, not just material sourcing. Rant over. ☕️
Real Results: What Happened When I Switched Kits for 30 Days
Last month, I committed to testing two kits side-by-side:
- KIT A: $6 Amazon multipack (unnamed to protect the guilty)
- KIT B: Beautyblender Pro Duo + Antimicrobial Pouch ($28)
Day 7: Kit A started crumbling around the edges. Foundation absorbed unevenly—needed 2x product.
Day 14: Client using Kit A developed milia under her eyes (confirmed by her derm). Kit B user? Zero irritation.
Day 30: Kit A was discolored, stiff, and emitted a faint sour smell. Kit B still bounced back perfectly after cleaning.
Verdict? Investing in a thoughtfully designed beauty sponge kit saves money long-term by reducing product waste and preventing skin issues. Plus, your makeup just… looks better. Like, *actually* expensive-skin good.
Beauty Sponge Kit FAQs
How many sponges should a beauty sponge kit include?
For daily users: 3–5 sponges minimum. This allows rotation while others dry or get cleaned. Travel kits can have 2 if they include a drying case.
Can I use a beauty sponge kit for cream and powder products?
Yes—but clean thoroughly between formulas. Oil-based creams cling to fibers and attract bacteria if not removed. Use separate sponges if possible (many kits include dedicated powder blenders).
Are silicone sponges better than foam?
Silicone sponges (like the Make Up For Ever Soft Blender) waste zero product and are ultra-hygienic—but they don’t blend as seamlessly as foam for liquid foundation. Best for spot-concealing or cream blush. Most pros keep both.
Is microwaving my sponge safe?
Terrible tip alert! No. Microwaving may kill surface bacteria but melts foam structure and releases toxic fumes from adhesives. Stick to gentle hand-washing.
Conclusion
Your beauty sponge kit isn’t just an accessory—it’s a skincare-makeup hybrid tool that impacts everything from coverage to complexion health. Skip the bargain-bin bundles. Invest in a kit with high-density, antimicrobial, shape-diverse sponges—and commit to cleaning and rotating them like your skin depends on it (because it does).
Do that, and you’ll stop fighting your tools… and start creating that seamless, second-skin finish you’ve been chasing.
Like a Tamagotchi, your beauty sponge needs daily care—or it dies tragically in week two.
Soft bounce, crisp edges,
Waste less, glow more today.
Hygiene first.